
How to Use a GPG Key with GitHub: Sign and Verify Commits
Create, register, and use a GPG key with GitHub so your commits are signed and verifiable.
Overview
A GPG (GNU Privacy Guard) key is part of the PGP (Pretty Good Privacy) ecosystem and uses public key cryptography:
- A public key can be shared
- A private key stays on your machine and is protected with a passphrase
On GitHub, GPG is most commonly used to sign commits or tags. Signed commits help collaborators verify that changes came from the expected author and were not altered after signing.
What you’ll do
- Download and install Git Bash (Windows).
- Create a new GPG key.
- List and manage your keys.
- Export your public key for GitHub.
- Add it to GitHub settings.
- Sign your commits.
- Delete a GPG key when needed.
Downloading Git Bash
We’ll use a terminal for commands in this guide. On Windows, Git Bash (installed with Git for Windows) is an easy option. On Linux or macOS, your default terminal works fine.
If you’re on Windows, download Git for Windows: https://gitforwindows.org/
During setup, the default options are usually fine.
💡 Tip: In Git Bash, pasting is often easiest with Shift + Insert instead of Ctrl + V.
Creating a GPG key
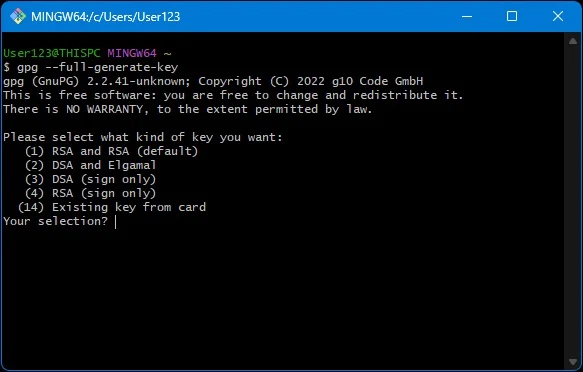
In Git Bash, run:
gpg --full-generate-keyFollow these prompts:
- Key type: (1) RSA and RSA (default)
- Key size:
4096 - Expiration:
0(never expire — convenient, though expiring keys are safer)
RSA is widely compatible and supports both signing/verifying and encryption/decryption.
Next, provide identity information:
- Real name – can be an alias.
- Email address – should match a verified email on your GitHub account (including a GitHub
noreplyemail if you use private email mode). - Comment – optional.
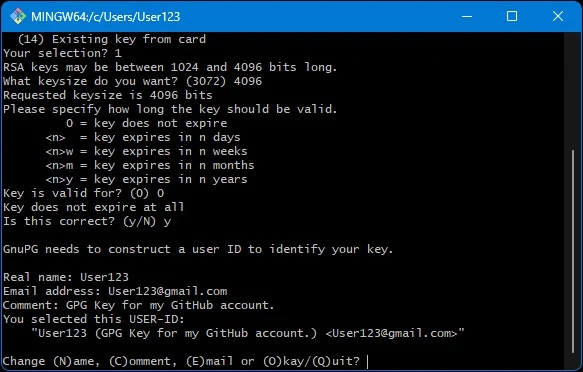
Finally, set a passphrase to protect your GPG key.
Listing your GPG keys
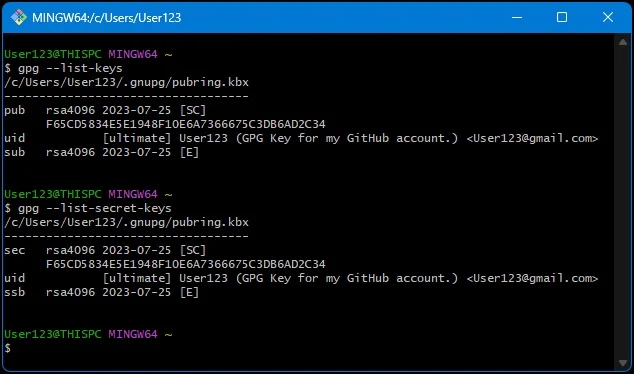
View existing keys on your machine:
Public keys:
gpg --list-keys --keyid-format=longPrivate keys:
gpg --list-secret-keys --keyid-format=longYou’ll see entries with Key IDs. Use the long key ID shown after rsa4096/ in the output.
Formatting your public key for GitHub
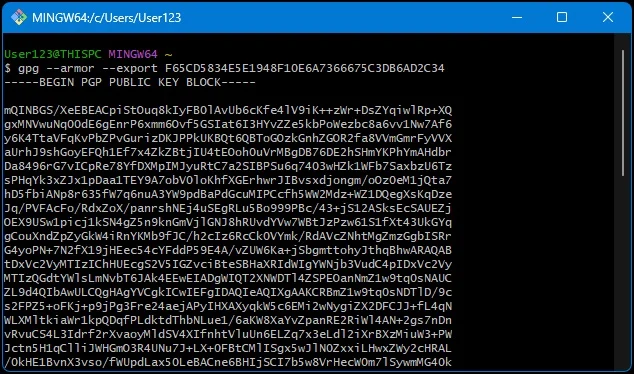
GitHub requires the ASCII-armored format. Export it with:
gpg --armor --export LONG_KEY_ID_HEREThis will print your public key in a block like:
-----BEGIN PGP PUBLIC KEY BLOCK-----
...
-----END PGP PUBLIC KEY BLOCK-----
Copy this entire block.
Adding the GPG key to GitHub
- Log into GitHub.
- Go to Settings > SSH and GPG keys.
- Click New GPG key.
- Paste the ASCII-armored public key (including the BEGIN/END lines).
- Give it a descriptive title (e.g., “Work Laptop GPG Key”).

You may need to verify the email address associated with your GPG key before GitHub accepts it.
Signing your GitHub commits
Tell Git which GPG key to use:
git config --global user.signingkey LONG_KEY_ID_HERETo sign commits explicitly, add -S:
git commit -S -m "Your commit message"To sign commits automatically by default:
git config --global commit.gpgsign trueWhen you push signed commits, GitHub will display a “Verified” badge in the commit history.

Deleting a GPG key
If a key is no longer needed on your local machine:
Delete the private key:
gpg --delete-secret-key YOURKEYIDDelete the public key:
gpg --delete-key YOURKEYIDAlso remove it from GitHub under Settings > SSH and GPG keys.
If a private key is compromised, do more than deletion: generate and publish a revocation certificate for that key.
Conclusion
Using a GPG key with GitHub strengthens trust in your work by proving authorship and integrity. You’ve learned how to create, export, and add keys to GitHub, as well as how to sign commits and manage keys over time.
This is just the start—explore advanced GPG features like key expiration, subkeys, and revocation certificates for even more control and security.